Golang 轮子之 Supervisor

golang 与Supervisor进程管理工具之间会擦出怎样的火花呢,来看看新轮子go-supervisor

Supervisor 是一个强大的 进程管理工具。

在非容器化管理的服务器上, Supervisor 是有非常广泛的使用场景的。

例如:

服务批量重启,多服务按顺序启动,服务oom后自动拉起,服务std日志收集等,甚至服务健康检查它都能做。

原 Supervisor (Python)

git: https://github.com/Supervisor/supervisor

doc: http://supervisord.org/

新轮子 Supervisor (Golang)

git: https://github.com/ochinchina/supervisord

对比

两个 Supervisor 对比

指标\语言 Python Golang
起源 2004 2017
当前版本 4.2.4 0.7.3
语言版本要求 2.7+ 或 3.4+ 1.11+
*unix 支持 支持
MacOS 支持 支持
Widnows 不支持 能跑
安装包大小 Pyton环境(40MB) + 脚本(490KB) 4.2MB
Web GUI 支持 支持

功能支持情况

共呢个\语言 Python Golang
分组 支持 支持
挂了自动拉起 支持 支持
定时重启 支持 支持
web端管理 支持 支持
监控文件自动重启 支持 支持
依赖顺序启动 支持 支持

这里只是列举了常用的功能,基本都实现了的,依靠golang按需runtime+可执行代码打包后,二进制部署相较 python 是更为方便和小巧的。

安装

gihub 上没有二进制包,需要clone代码,手动编译。

$ git clone https://github.com/ochinchina/supervisord
$ cd supervisord
$ go generate

# 以下代码会编译出 linux 平台二进制可执行文件
$ GOOS=linux go build -tags release -a -ldflags "-linkmode external -extldflags -static" -o supervisord
# mac 下
$ go build -tags release -o supervisord

试试

$ ./supervisord --help
Usage:
  supervisord [OPTIONS] <command>

Application Options:
  -c, --configuration= the configuration file
  -d, --daemon         run as daemon
      --env-file=      the environment file

Help Options:
  -h, --help           Show this help message

Available commands:
  ctl      Control a running daemon
  init     initialize a template
  service  install/uninstall/start/stop service
  version  show the version of supervisor

使用

  • 先创建一个配置文件
$ vi supervisor.conf
[program:test]
command = watch -n 5 "echo Hello!"
  • 启动
$ supervisord -c supervisor.conf
INFO[2022-10-15T17:31:24+08:00] load configuration from file                  file=./supervisor.conf
INFO[2022-10-15T17:31:24+08:00] create process:test
INFO[2022-10-15T17:31:24+08:00] stop listening
INFO[2022-10-15T17:31:24+08:00] try to start program                          program=test
DEBU[2022-10-15T17:31:24+08:00] wait program exit                             program=test
INFO[2022-10-15T17:31:25+08:00] success to start program                      program=test

## 此时该 supervisord 会前台运行,退出终端,或者 Ctrl+C 都会推出,会结束所有的程序。
^CINFO[2022-10-15T17:32:39+08:00] receive a signal to stop all process & exit   signal=interrupt
INFO[2022-10-15T17:32:39+08:00] stop the program                              program=test
INFO[2022-10-15T17:32:39+08:00] force to kill the program                     program=test
INFO[2022-10-15T17:32:39+08:00] Send signal to program                        program=test signal=killed
INFO[2022-10-15T17:32:39+08:00] program stopped with status:signal: killed    program=test
INFO[2022-10-15T17:32:39+08:00] program exited                                program=test
INFO[2022-10-15T17:32:39+08:00] Stopped by user, don't start it again         program=test
  • 启动并运行到后台
$ supervisord -c supervisor.conf -d

这样就启动了

http 管理

supervior 同样提供了 Web GUI 管理入口,我们来启用配置试试

[program:test]
command = watch -n 5 "echo Hello"

[inet_http_server]
port=127.0.0.1:9001

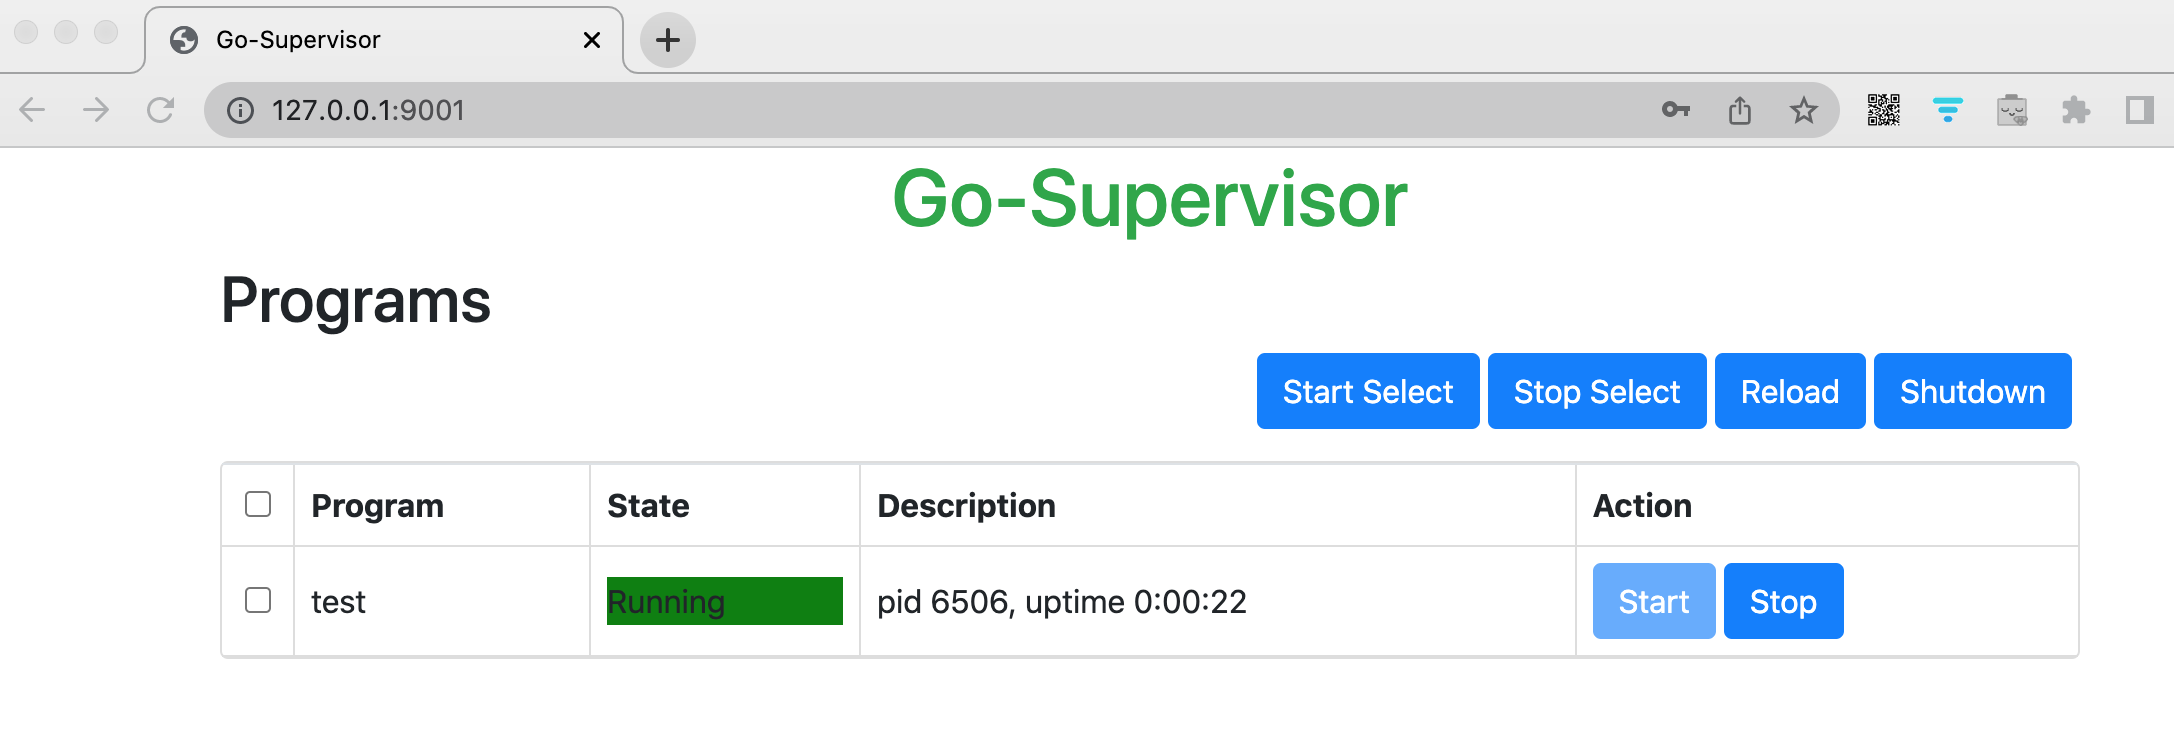
访问: http://127.0.0.1:9001

web_gui

同样支持 http Auth, 按照如下配置

[inet_http_server]
port=127.0.0.1:9001
username=test1
password=thepassword

注意: Shutdown 是停掉 supervisor 服务本身,包括 Web 入口,需要登陆到服务器,手动启动后,才能继续使用。要停掉所有自程序,选择全部然后点击 Stop Select

文件监控

当我们部署,或更新程序时,希望 supervisor 能自动关闭,并运行新的可执行文件,那么 文件监控 功能就派上用场了。

go-supervisor 支持多种文件监控模式:

  1. 执行的程序本身监控
  2. 某个文件夹内监控
  3. 文件监控
  • 配置方式
[program:golang]
command = /Users/paulxu/golang/go-learn/main -conf ./Users/paulxu/golang/go-learn/config.toml
restart_when_binary_changed=true

这里的测试代码我放到文章最后了

INFO[2022-10-15T20:33:20+08:00] program is changed, restart it                program=golang
INFO[2022-10-15T20:33:20+08:00] stop the program                              program=golang
INFO[2022-10-15T20:33:20+08:00] force to kill the program                     program=golang
INFO[2022-10-15T20:33:20+08:00] Send signal to program                        program=golang signal=killed
INFO[2022-10-15T20:33:20+08:00] program stopped with status:signal: killed    program=golang
INFO[2022-10-15T20:33:20+08:00] program exited                                program=golang
INFO[2022-10-15T20:33:20+08:00] Stopped by user, don't start it again         program=golang
INFO[2022-10-15T20:33:21+08:00] try to start program                          program=golang
DEBU[2022-10-15T20:33:21+08:00] wait program exit                             program=golang
INFO[2022-10-15T20:33:22+08:00] success to start program                      program=golang

监控到变化后,重启方式也有两种,一种是:直接kill。另一种是发送信号量给程序,让程序自行处理。

注意: 如果 supervisor 本身发了 kill 信号给程序,程序自己结束了,superviosr 默认也不会帮你在重启程序,它的设计逻辑时,我只负责发信号,其他程序自理。这里你可以手动新增一条配置:

[program:golang]
command = /Users/paulxu/golang/go-learn/main -conf ./Users/paulxu/golang/go-learn/config.toml
restart_when_binary_changed=true
autostart=true #  这行配置

如果管理了在线的大流量服务,推荐使用第二种,平滑重启,因为直接kill程序,会导致请求处理一半,或事务进行到一半中止,进而数据不一致。

好的,我们再次调整配置

[program:golang]
command = /Users/paulxu/golang/go-learn/main -conf ./Users/paulxu/golang/go-learn/config.toml
restart_when_binary_changed=true
restart_signal_when_binary_changed=9 # SIGKILL

来看下日志:

INFO[2022-10-15T20:37:58+08:00] program is changed, restart it                program=golang
INFO[2022-10-15T20:37:58+08:00] Send signal to program                        program=golang signal=terminated
INFO[2022-10-15T20:37:58+08:00] program stopped with status:exit status 0     program=golang
INFO[2022-10-15T20:37:58+08:00] program exited                                program=golang
INFO[2022-10-15T20:37:58+08:00] Don't start the stopped program because its autorestart flag is false  program=golang

注意这里的日志,说的是,supersivor 给程序发了 信号,但是程序退出了,由于,你启用自动重启配置,所有,没有启动该程序。

这里是信号发错了,调整一下:

[program:golang]
command = /Users/paulxu/golang/go-learn/main -conf ./Users/paulxu/golang/go-learn/config.toml
restart_when_binary_changed=true
restart_signal_when_binary_changed=SIGHUP # 1 这里填数字字符都行

这下重新启动supervisor,看下效果。

程序运行日志:

2022-10-16 11:00:27.754 [INFO] main.go:13: start
2022-10-16 11:00:27.754 [INFO] main.go:21: waiting signal~
2022-10-16 11:00:28.755 [INFO] main.go:17: golang program is running~
2022-10-16 11:00:29.757 [INFO] main.go:17: golang program is running~
2022-10-16 11:00:30.761 [INFO] main.go:17: golang program is running~
2022-10-16 11:00:31.765 [INFO] main.go:17: golang program is running~
2022-10-16 11:00:32.768 [INFO] main.go:17: golang program is running~
2022-10-16 11:00:33.771 [INFO] main.go:17: golang program is running~
2022-10-16 11:00:34.774 [INFO] main.go:17: golang program is running~
2022-10-16 11:00:35.779 [INFO] main.go:17: golang program is running~
2022-10-16 11:00:36.783 [INFO] main.go:17: golang program is running~
2022-10-16 11:00:37.659 [INFO] main.go:32: golang get signal hangup [sighup]
2022-10-16 11:00:37.788 [INFO] main.go:17: golang program is running~
2022-10-16 11:00:38.790 [INFO] main.go:17: golang program is running~

这样之后,我们就能实现部署新的程序后,自动平滑重启程序了。

注意:在 Web 端,手动 stop/start 程序,不会发信号量到程序!

监控文件夹

刚刚展示目标程序变更,自动重启。那么配置文件更新了,自动重启如何配置呢?

注意:如果程序内自动监控了文件变化并更新配置(推荐这样做),则不需要 supervisor 来发信号给程序本身了。

这里新增了两行配置,1.配置监控存放配置文件的文件夹,2. 配置文件夹内文件变化时,发什么信号通知程序。

[program:golang]
command = /Users/paulxu/golang/go-learn/main -conf /Users/paulxu/golang/go-learn/config/config.toml
restart_when_binary_changed=true
restart_signal_when_binary_changed=SIGHUP
restart_directory_monitor=/Users/paulxu/golang/go-learn/config/
restart_signal_when_file_changed=SIGHUP

测试代码

package main

import (
    "os"
    "os/signal"
    "syscall"
    "time"

    "github.com/gogf/gf/frame/g"
)

func main() {
    g.Log().Line().Info("start!!")
    go func() {
        for {
            time.Sleep(time.Second)
            g.Log().Line().Info("golang program is running~")
        }
    }()

    g.Log().Line().Info("waiting signal~")
    c := make(chan os.Signal, 1)
    signal.Notify(c, syscall.SIGHUP, syscall.SIGQUIT, syscall.SIGTERM, syscall.SIGINT)
    for {
        select {
        case s := <-c:
            switch s {
            case syscall.SIGQUIT, syscall.SIGTERM, syscall.SIGINT:
                g.Log().Line().Infof("golang get signal %+v", s)
                return
            case syscall.SIGHUP:
                g.Log().Line().Infof("golang get signal %+v [sighup]", s)
            default:
                g.Log().Line().Infof("golang get other signal %+v", s)
                return
            }
        }
    }
}

最后

好的,今天给大家介绍了一款 superviorgolang轮子,以及基本使用方法。可以看到一些常用的基础和golang碰撞后,擦出了不一样的火花。由于 Go 语言的编译工具链会全静态链接构建二进制文件,All in One 的设计理念,对运维部署时非常友好的。期待更多这样的轮子。

虽然,在当前容器化时代,它的使用场景被进一步挤压,但是在小型站点,实体机上使用还是很方便的。

关注我,了解更多golang知识~

qrcode

又一 Golang Proto Toml SQL 转换神器

如何通过JSON生成Golang结构体代码,如何通过TOML生成Golang代码,如果通过SQL生成Golang代码,或者如何通过CURL生成Golang代码,来这里,一个网页所有功能一并打包给你

背景

在用 Golang 语言做“多”服务开发过程中,做了很多 CURD 业务, 静下来一琢磨发现:

  1. 出需求
  2. 按照需求建表
  3. 通过表定义 grpc 字段,也就是定义 proto 。
  4. proto 生成 pb.go 文件。
  5. 端口层出接口定义, json 格式。

就是把mysql字段提取出来,然后生成go结构体proto message 而已,于是就在想能否做个工具来解决这个问题。

笔者菜鸡,也就用 golang 搞搞 curd 啦~

所以,我就想有一款工具能够定义好 create table sql,就能自动创建出 proto 文件,json 结构体。

说干就干,不过磕磕绊绊,捣鼓了一年多,鸽了又鸽,终于面世了。

看着去年的提交,做这么个简单的东西也要那么久啊~

项目地址

访问 http://tools.itjsz.com

使用

SQL

  • 通过SQL 生成 Go struct, Proto

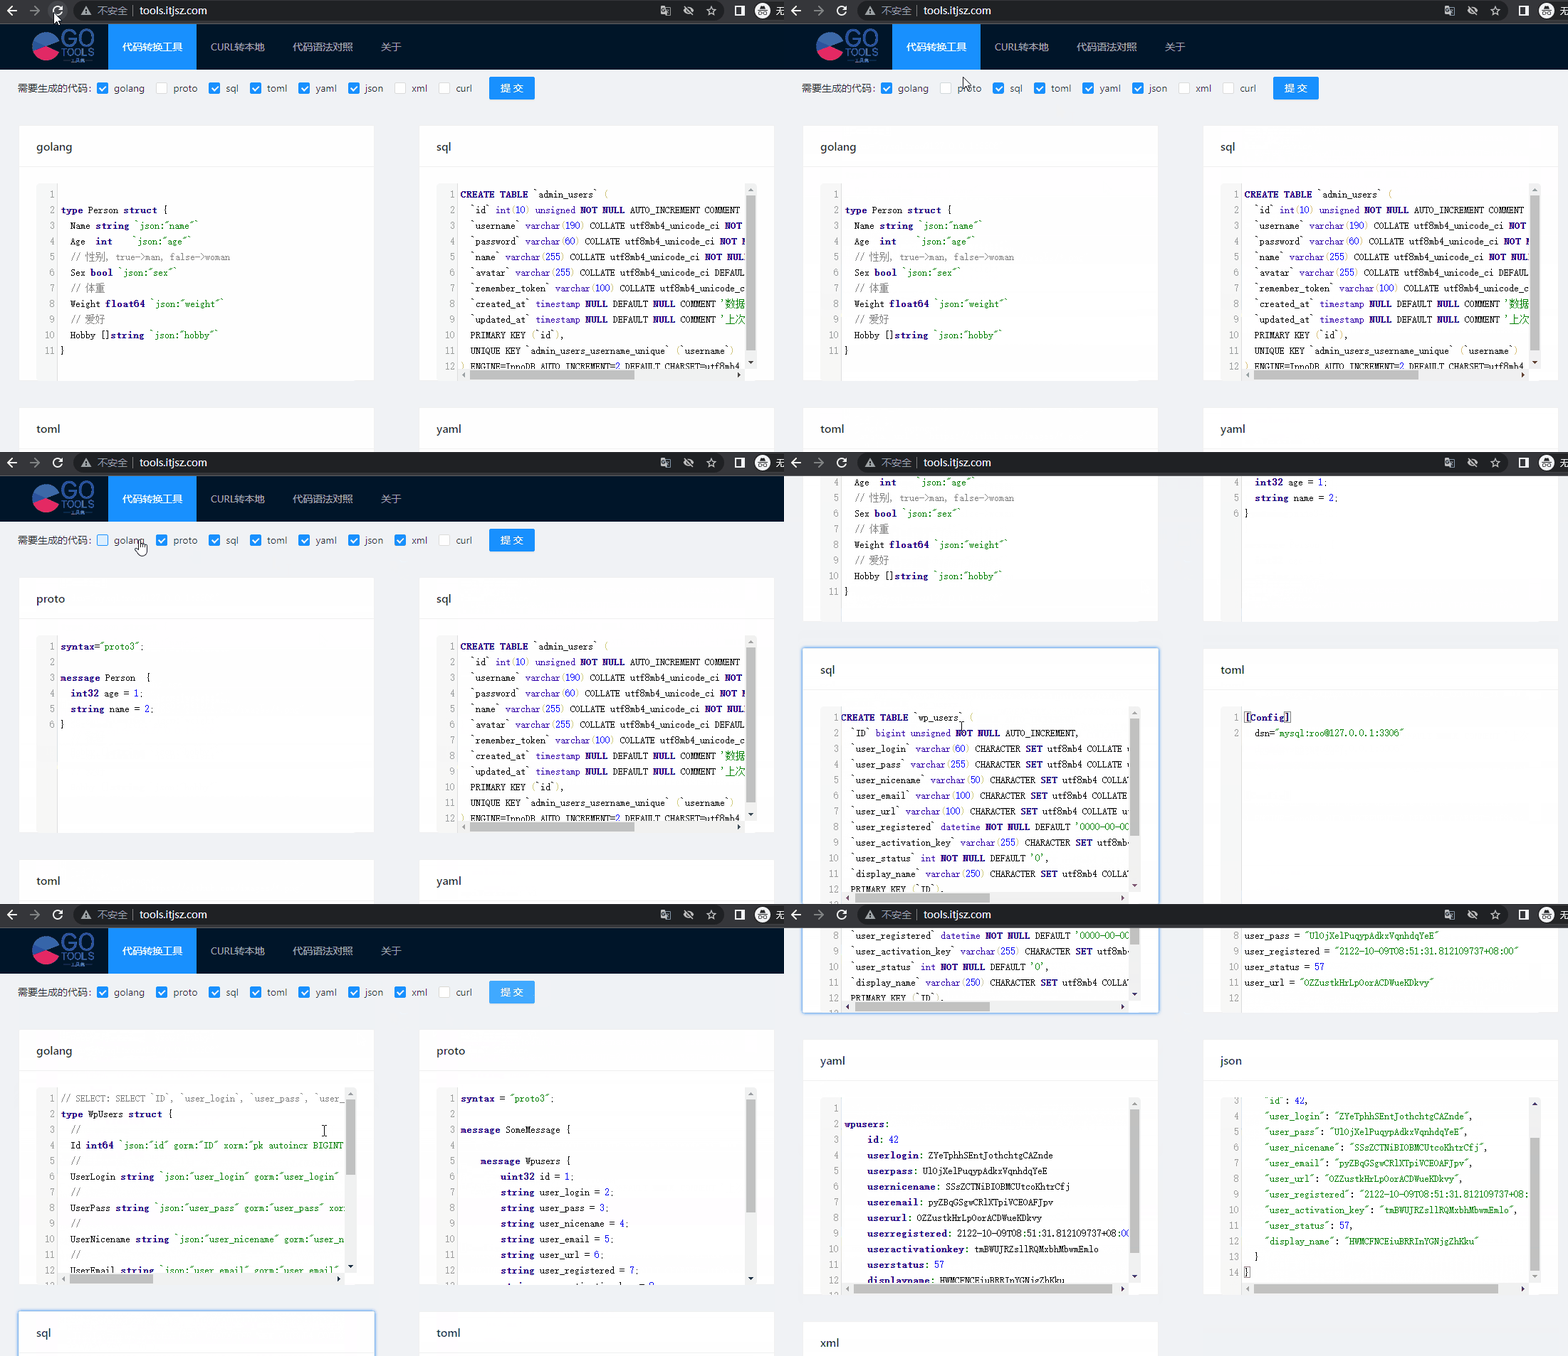
这里我们传入 WordPress 库的 wp_user 表。

暂不支持通过其他类型数据来生成 create table SQL

Yaml

  • 通过 yaml 生成其他格式数据

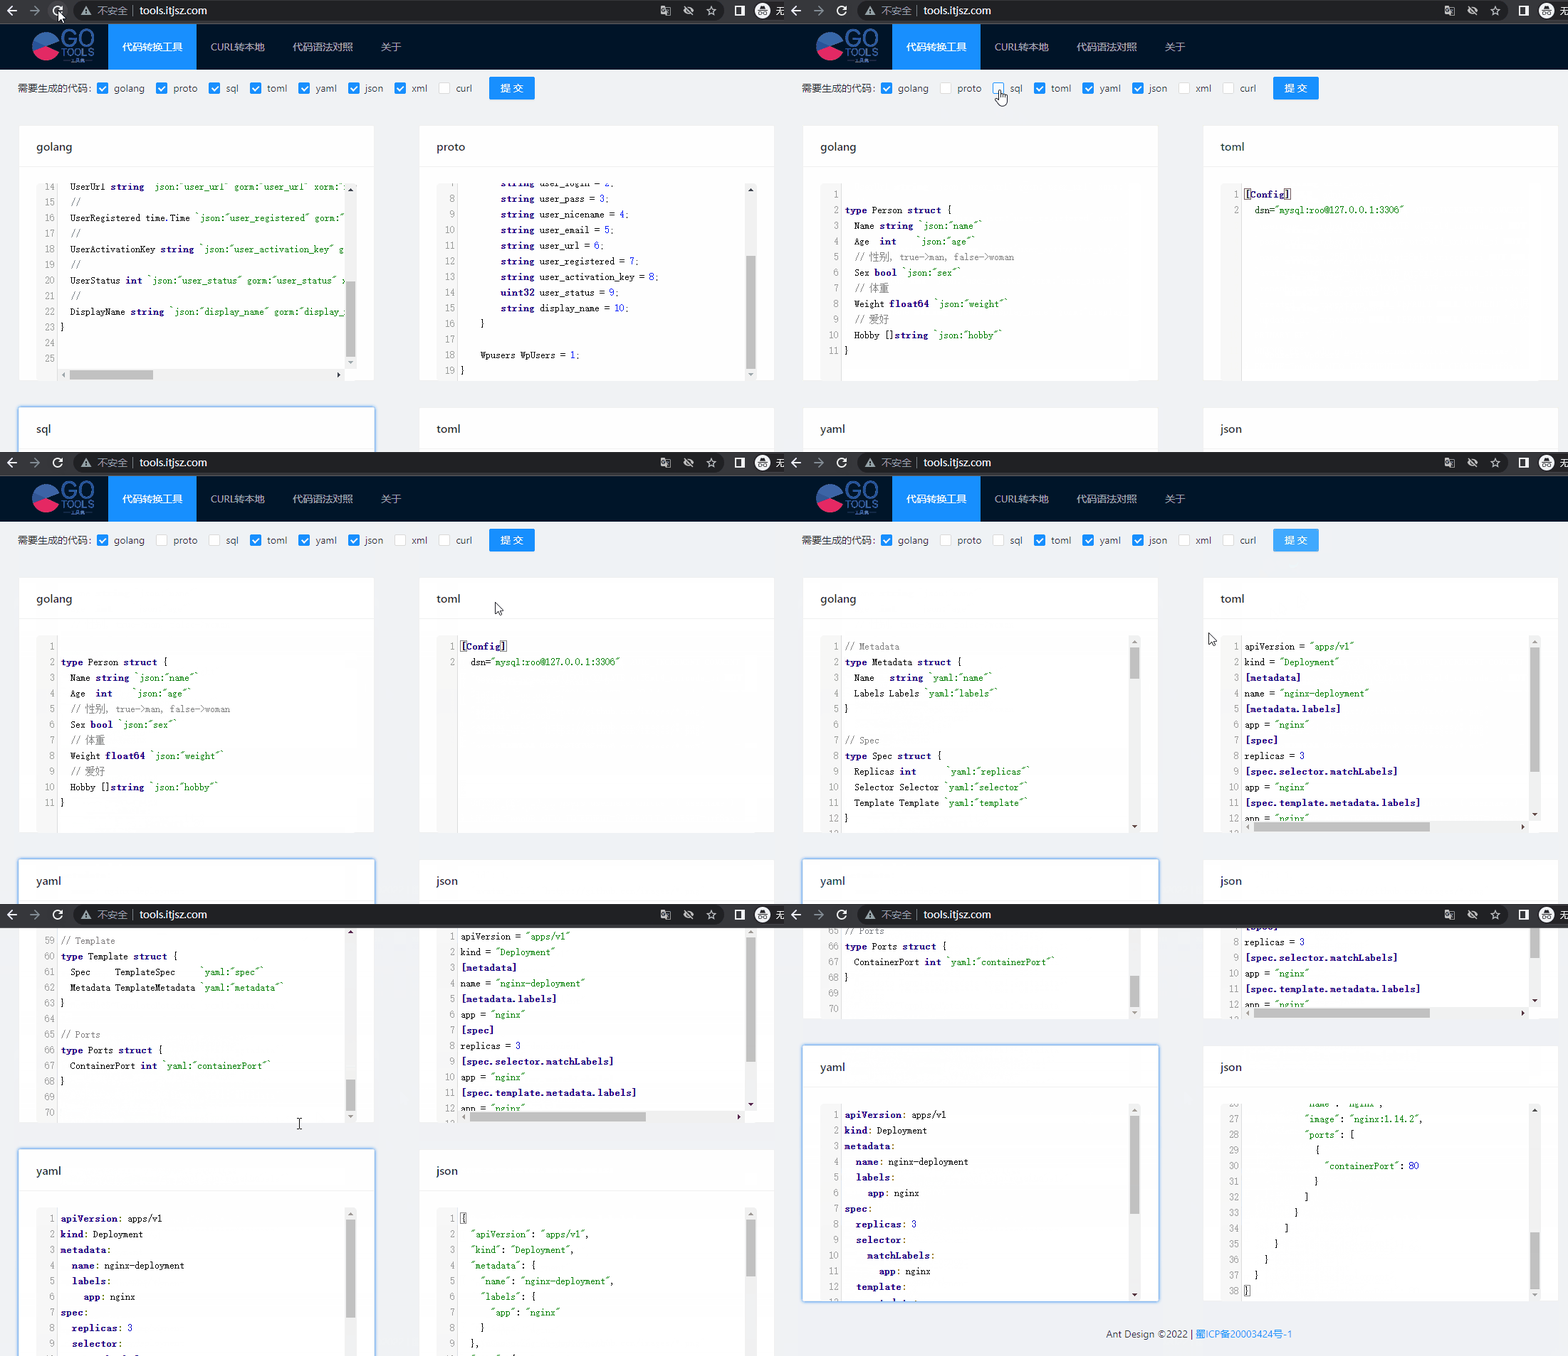
这里拿 k8s 创建 deploy 的yaml举例

Toml

  • 通过 Toml 转换成其他格式数据

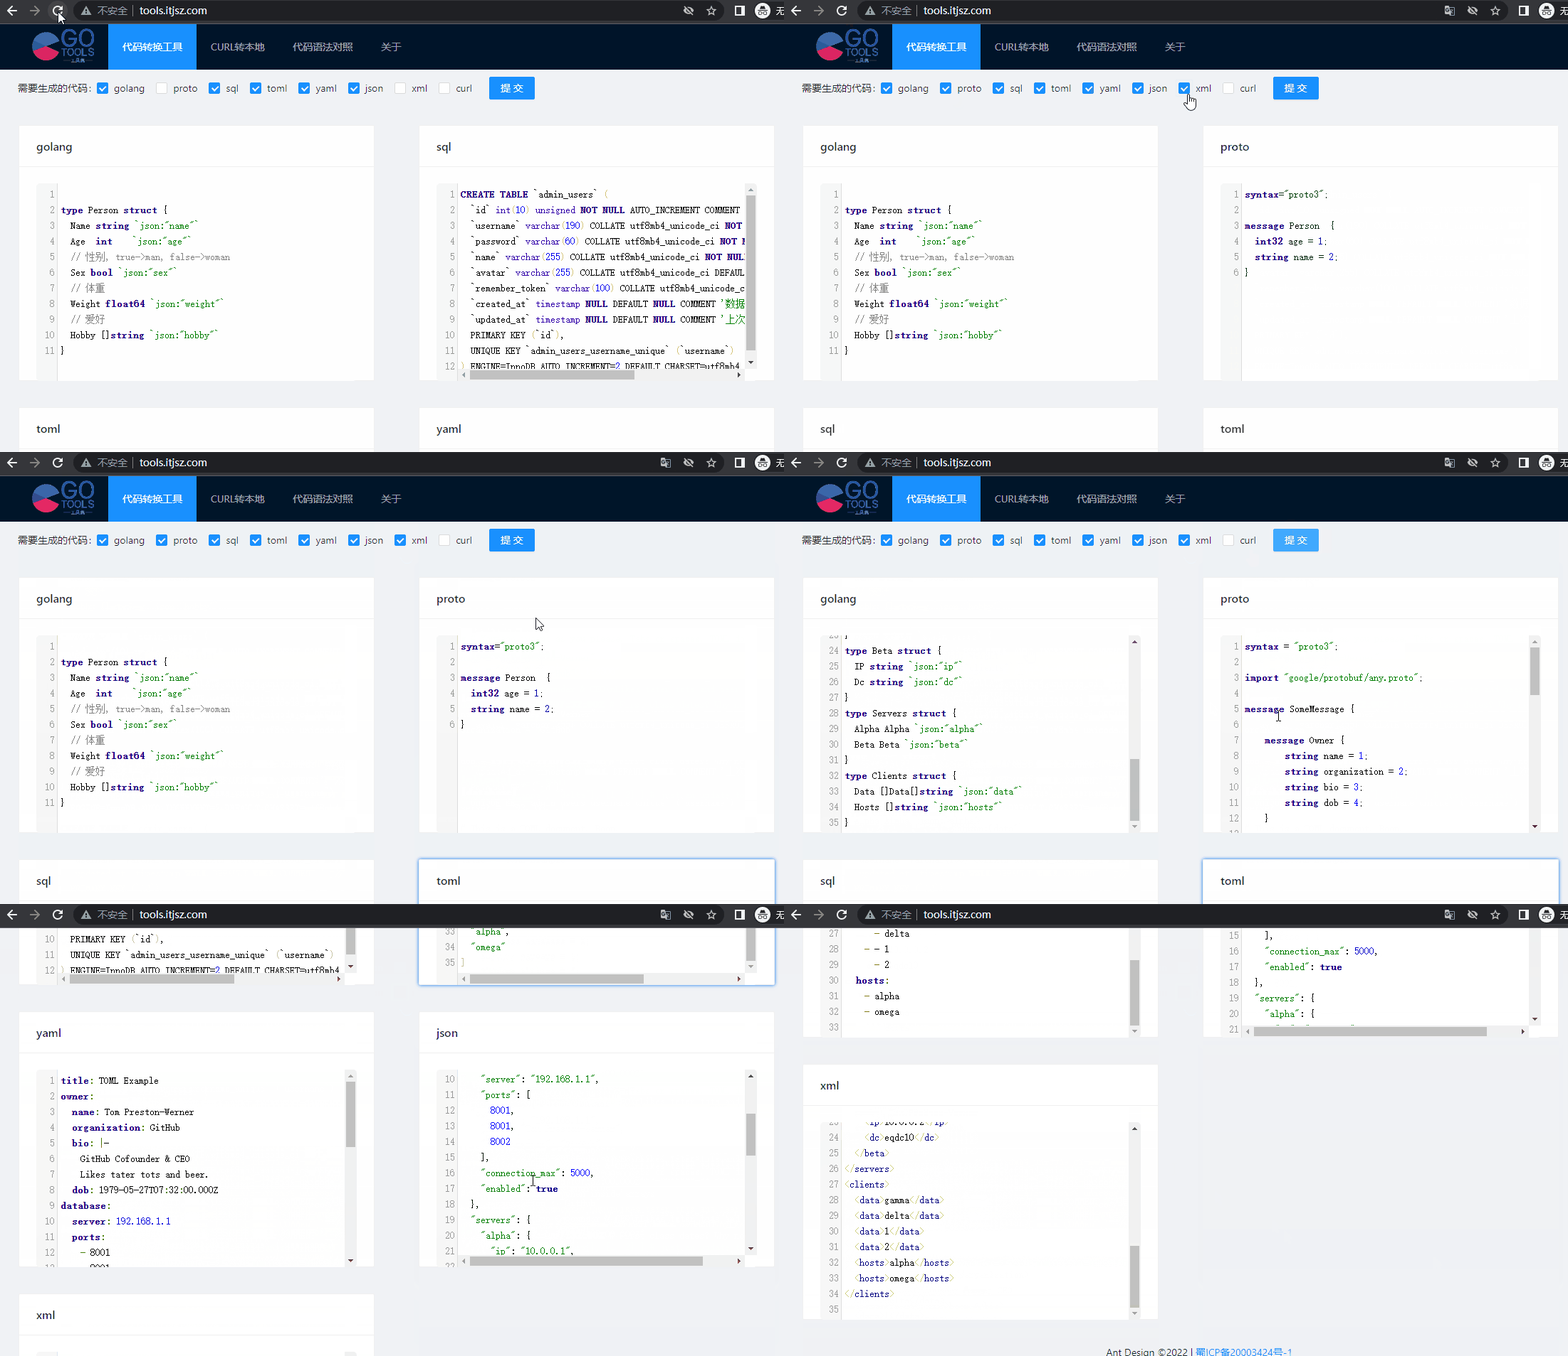
项目中常常用 Toml 作为配置文件。这里我们传入 Toml 文本

其他类型

其他还有 jsonxmlproto 格式,就不再一一演示了,使用方法大同小异。

最后

产品已上线,欢迎大家体验,使用中遇到啥问题,或者有什么建议,通过下面工总号告诉我。

qrcode

Synergy-core 编译 使用 教程

Synergy 是一款非常棒的跨平台 鼠标、键盘、剪切板共享软件,不过GUI版本1.8.8停留在x32位,且不免费。所以转投Synergy-core 开源版,在此分享一下编译x64位,以及使用心得

Synergy

Synergy是一个跨平台的 鼠标、键盘、剪切板共享软件,支持Windows,Mac,Linux主流桌面平台。今天我就手把手把这个软件分享给大家。

如果你在用两台电脑,你是如何在他们之间传输文件的,又是如何切换键盘鼠标的,诚然我知道Windows官方出的鼠标有 无界 功能。今天我介绍的synergy软件,你用了之后,你就再也不用在微信的 文件传输助手 上互传文件了,直接在这个电脑复制,在另一个电脑上粘贴!不受硬件限制,只要两台电脑ip互联互通。

无界鼠标由于是微软出品的,所以只支持 Windows 平台,安装包也是 MSI 文件格式。

Synergy-core 是开源的cli程序.

官网:https://symless.com/synergy

开源地址:https://github.com/symless/synergy-core

下载

GUI版程序只能官网付费上下载,没有登陆App Store, 还有点需要注意1.8.8及以前的版本都是32位的程序,所以这次来折腾下64位的开源版。

Mac OS Cotalina 开始,就完全不能运行32位的程序了

安装

如果是官网下载Synergy GUI版,那双击就完事了。

编译

这里说下github上开源的core版本,编译,安装。

Mac OS 环境

安装依赖,编译软件,编译,安装:

# Install Homebrew

## 安装相关编译软件
$ brew install cmake
$ brew install qt
$ brew install openssh
$ brew install git

## 检查qt 安装信息,以及目录,等下需要用到 /usr/local/Cellar/qt/5.15.0/Frameworks/
$ brew info qt

## 添加一个环境变量
$ export CMAKE_PREFIX_PATH="/usr/local/Cellar/qt/5.15.0/Frameworks/"

# 下载源码并进入源码目录
$ git clone https://github.com/symless/synergy-core.git
$ cd synergy-core
$ mkdir build
$ cd build
## 准备编译参数
$ cmake -DCMAKE_OSX_SYSROOT=/Applications/Xcode.app/Contents/Developer/Platforms/MacOSX.platform/Developer/SDKs/MacOSX10.15.sdk  -DCMAKE_OSX_DEPLOYMENT_TARGET=10.15 -DCMAKE_OSX_ARCHITECTURES=x86_64 
## 编译
make

Windows 编译

这里我在Windows 环境安装了 最新Qt,和 Visual Studio community 2019.

Add C:\Qt\Tools\QtCreator\bin to the system PATH

Set CMAKE_PREFIX_PATH environment variable
C:\Qt\5.12.5\msvc2017_64

$ cd Projects\synergy
$ mkdir build
$ cd build
$ call "C:\Program Files (x86)\Microsoft Visual Studio 14.0\VC\vcvarsall.bat"
$ cmake -G "Visual Studio 14 2015 Win64" -DCMAKE_BUILD_TYPE=Debug ..
$ msbuild synergy-core.sln /p:Platform="x64" /p:Configuration=Debug /m
$ cd ..
$ copy ext\openssl\windows\x64\bin\* build\
$ cd Projects\synergy-core
$ mkdir build
$ cd build
$ call "C:\Program Files (x86)\Microsoft Visual Studio\2019\Community\VC\Auxiliary\Build\vcvarsall.bat" x86_amd64
$ cmake -G "Visual Studio 16 2019" -DCMAKE_BUILD_TYPE=Debug ..
$ msbuild synergy-core.sln /p:Platform="x64" /p:Configuration=Debug /m

Linux 编译

$ cd Projects/synergy
$ mkdir build
$ cd build
$ cmake ..
$ make

编译成功,会生成3个可执行文件。编辑后产物在:

./synergy-core/build/bin/

可执行文件

synergy-core

命令行程序:synergy-core, synergyc, synergys.

Synergy Core v1.x

对于1.x版本,client,server是两个程序,也就是分别对应:synergyc,synergys。

OS Command
Windows synergyc [server IP]
macOS ./synergyc [server IP]
Linux ./synergyc [server IP]
OS Command
Windows synergys -c [path to config file]
macOS ./synergys -c [path to config file]
Linux ./synergys -c [path to config file]

Synergy Core v2.x

v2.x,server,client 都是一个程序了,通过不同的命令来确定自己的职责。

OS Command
Windows synergy-core --client [server IP]
macOS ./synergy-core --client [server IP]
Linux ./synergy-core --client [server IP]
OS Command
Windows synergy-core --server -c [path to config file]
macOS ./synergy-core --server -c [path to config file]
Linux ./synergy-core --server -c [path to config file]

Command help

通过一下命令:

$ ./synergyc --help
$ ./synergys --help

你能获取v1.x synergy的帮助信息,但是v2.x不知道是不是忘了把这个加上。

$ ./synergy-core --help     ## 不会显示帮助信息

所以我就把它应有的帮助信息放这里了。

Options for synergy-core --client

Usage: synergy-core --client [--yscroll <delta>] [--daemon|--no-daemon] [--name <screen-name>] [--restart|--no-restart] [--debug <level>] <server-address>

Connect to a synergy mouse/keyboard sharing server.

  -d, --debug <level>      filter out log messages with priority below level.
                             level may be: FATAL, ERROR, WARNING, NOTE, INFO,
                             DEBUG, DEBUG1, DEBUG2.
  -n, --name <screen-name> use screen-name instead the hostname to identify
                             this screen in the configuration.
  -1, --no-restart         do not try to restart on failure.
*     --restart            restart the server automatically if it fails.
  -l  --log <file>         write log messages to file.
      --no-tray            disable the system tray icon.
      --enable-drag-drop   enable file drag & drop.
  -f, --no-daemon          run in the foreground.
*     --daemon             run as a daemon.
      --yscroll <delta>    defines the vertical scrolling delta, which is
                             120 by default.
  -h, --help               display this help and exit.
      --version            display version information and exit.

* marks defaults.

The server address is of the form: [<hostname>][:<port>].  The hostname
must be the address or hostname of the server.  The port overrides the
default port, 24800.

Options for synergy-core --server

Usage: synergy-core --server [--address <address>] [--config <pathname>] [--daemon|--no-daemon] [--name <screen-name>] [--restart|--no-restart] [--debug <level>]

Start the synergy mouse/keyboard sharing server.

  -a, --address <address>  listen for clients on the given address.
  -c, --config <pathname>  use the named configuration file instead.
  -d, --debug <level>      filter out log messages with priority below level.
                             level may be: FATAL, ERROR, WARNING, NOTE, INFO,
                             DEBUG, DEBUG1, DEBUG2.
  -n, --name <screen-name> use screen-name instead the hostname to identify
                             this screen in the configuration.
  -1, --no-restart         do not try to restart on failure.
*     --restart            restart the server automatically if it fails.
  -l  --log <file>         write log messages to file.
      --no-tray            disable the system tray icon.
      --enable-drag-drop   enable file drag & drop.
  -f, --no-daemon          run in the foreground.
*     --daemon             run as a daemon.
  -h, --help               display this help and exit.
      --version            display version information and exit.

* marks defaults.

The argument for --address is of the form: [<hostname>][:<port>].  The
hostname must be the address or hostname of an interface on the system.
The default is to listen on all interfaces.  The port overrides the
default port, 24800.

If no configuration file pathname is provided then the first of the
following to load successfully sets the configuration:
  $HOME/.synergy.conf
  /etc/synergy.conf

配置

GUI的配置就不讲了,这里说下cli程序的配置。

原文在这里Synergy Text Config,我这里简单提一下。然后按照我给的模版来改改就能用,需要特殊定制可看看官方wiki,或者留言问我。

Synergy 的配置文件基本格式:

section: ''name''
    ''args''
end

配置类型有4大类:

  • screens
  • aliases
  • links
  • options

aliases

定义 host name 和 屏幕命名的关系。

那么如何获取 host name呢?

mac os 环境下:

$ hostname
## 或者
$ echo $HOSTNAME

screens

定义我们的屏幕,命名,以及在操作各个屏幕时,是否响应一些特殊按键。

Windows,Linux,Mac 都有各自的特殊按键,如win, command, meta按键等,如果不是跨平台,都不需要做特殊处理。

links

定义各个屏幕之间的排列方位,这个很重要。

{left|right|up|down}[<range>] = name[<range>]

关于range参数就比较有意思了,合理配置可是下如下效果。

section: links
     moe:
         right        = larry
         up(50,100)   = curly(0,50)
     larry:
         left         = moe
         up(0,50)     = curly(50,100)
     curly:
         down(0,50)   = moe
         down(50,100) = larry(0,50)
 end

实现了:

#       +-----------+  
#       |   curly   |  
#       |           | 
#       +-----------+ 
# +----------+ +----------+
# |    moe   | |  larry   | 
# |          | |          | 
# +----------+ +----------+ 

也就是在curly屏幕时,鼠标往左下滑,会滑到moe屏幕,往右下滑,会滑到larray屏幕。

options

其他选项,例如定义心跳间隔,屏幕切换粘连时间,

配置样例

好的还是来一个大而全的配置文件例子吧。

启动一个Synergy-core server,配置文件是必须的!

Example textual configuration file
This example comes from doc/synergy-basic.conf

# sample synergy configuration file
#
# comments begin with the # character and continue to the end of
# line.  comments may appear anywhere the syntax permits.
# +----------+  +---------+ +---------+
# | mac-mini |  | macbook | | windows |
# |          |  |         | |         |
# +----------+  +---------+ +---------+

section: screens
    # three hosts named:  mac-mini, macbook, and windows
    # These are the nice names of the hosts to make it easy to write the config file
    # The aliases section below contain the "actual" names of the hosts (their hostnames)
    mac-mini:
    macbook:
    windows:
end

section: links
    # windows is to the right of macbook
    # mac-mini is to the left of macbook
    macbook:
        right(0,100) = windows # the numbers in parentheses indicate the percentage of the screen's edge to be considered active for switching)
        left  = mac-mini
        # shift = shift (shift, alt, super, meta can be mapped to any of the others)

    # macbook is to the right of mac-mini
    mac-mini:
        right = macbook

    # macbook is to the left of windows
    windows:
        left  = macbook
end

section: aliases
    # The "real" name of windows is John-Smiths-windows-3.local. 
    # If we wanted we could remove this alias and instead use John-Smiths-windows-3.local everywhere windows is above. 
    # Hopefully it should be easy to see why using an alias is nicer
    macbook:
        Pauls-MBP.local
    mac-mini:
        jumei-deMac-xp-mini.local
end

section: options
    switchDelay = 400   # 鼠标滑到边缘时,提留多久才能切换屏幕
    clipboardSharing = true # 共享剪切板
    clipboardSharingSize = 10000    # 剪切板共享字节大小限制,单位:千字节
end

启动

## 启动服务端
$ ./synergy-core --server --address 172.20.50.25:24800 --no-daemon --name macbook --config ./synergy.conf

## 启动其中一个客户端
$ ./synergy-core --client --no-daemon --name mac-mini 172.20.50.25:24801

常见问题

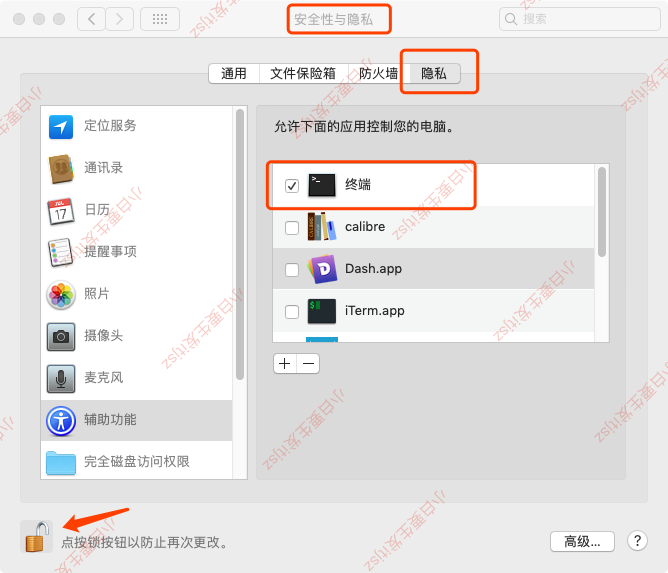
问题1:FATAL: An error occurred: assistive devices does not trust this process, allow it in system settings.

这是应为你运行命令行程序调用了系统的敏感接口,所有报错了。你需要给这个命令行软件授予权限.

也就是说,你用iTerm运行Synergy-core,就给iTerm授权,你用系统terminal运行的就给terminal授权。

我用的Mac,就在 系统偏好设置 > 安全性隐私 > 隐私 为其配置上。

权限授予

如果是第一次授权,一般会有个弹窗,你按照弹框点进去就行了。

问题2: synergy-core[66198:16759205] pid(66198)/euid(501) is calling TIS/TSM in non-main thread environment, ERROR : This is NOT allowed. Please call TIS/TSM in main thread!!!

你是不是还启动 Synergy GUI 程序,把它关掉就好了。

总结

synergy-core程序用着还不错,虽然配置麻烦了一点,不过鼠标,键盘映射都没问题,复制粘贴(图片都能跨屏幕传)也都正常。不过还没试过跨macos,windows使用过。试了再回来

参考

  • https://github.com/symless/synergy-core/wiki
  • https://my.oschina.net/k4nz/blog/4337405
  • https://apple.macx.cn/thread-2174542-1-1.html